As a seasoned gardener, I know how important it is to properly care for okra plants throughout their growing season. When hot weather hits, okra thrives in conditions where other vegetables wilt. However, without the right horticultural practices, okra plants can become overgrown and less productive.
That’s where pruning comes in. As counterintuitive as it may seem, regularly pruning okra can significantly boost yield and help your plants stay healthy. With a few simple techniques on how to prune okra plants, you’ll be harvesting plentiful amounts of okra pods for much longer!
The Benefits of Pruning Okra Plants
Let me tell you about some of the key benefits of pruning okra:
Improved Air Circulation
Dense foliage is perfect for okra to conserve moisture in hot, dry conditions. However, pruning allows for increased airflow between plants. This reduced humidity prevents fungal and bacterial diseases from developing within the canopy. With better ventilation, okra plants remain vigorous for far longer into the season.
Increased Light Exposure
Thinning out some of the inner leaves and branches allows more sunlight to reach lower portions of the plant. This stimulates additional vegetative growth and pod production deeper within the plant structure. More light equals more energy for your okra plants to dedicate to producing bountiful harvests.
Better Plant Structure
Strategic pruning removes lanky, overcrowded growth to maintain an open center in your okra patch. This achieves an ideal bushy shape with branched structures. Well-structured plants set pods along their length for an earlier, more protracted harvest period compared to lax, unpruned okra.
Extended Harvest Season
When lower leaves and small side shoots are snipped off, okra plants respond by redirecting resources into pod production. By keeping plants at a manageable size, you encourage continued flowering and fruit sets for many more weeks after the initial harvests are over. This extends your harvest window well into fall.
Less Pest & Disease Pressure
Dense foliage is like an all-you-can-eat buffet for okra pests and the pathogens they carry. Pruning promotes air circulation that lowers humidity levels, making it harder for problems to take hold in the first place. Additionally, smaller plants dry out quicker after rains, minimizing conditions where diseases thrive.
As you can see, regular pruning offers many growing advantages for your okra crop. In the next section, we’ll discuss when the ideal times are to begin shaping your okra plants.
When to Prune Your Okra Plants
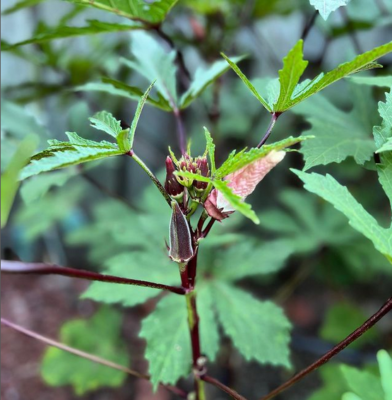
The ideal times to start pruning depend on the variety you’re growing and the speed of growth in your climate. However, there are a few general guidelines to follow regardless of varietal differences:
- 4-6 Weeks After Transplanting: By around a month after setting out transplants or direct seeding, plants should be established enough to begin minor tip pruning and suckering. This keeps plants at a uniform height without overcrowding.
- Before Flowering Begins: Once plants reach 2-3 feet tall and side shoots begin forming vigorously, do a round of heavier pruning to establish your planting’s main framework. Remove any weak, diseased, or damaged growth at this stage.
- When Plants Reach 4-6 Feet: Very tall varieties may need reining in after exceeding 4 feet to maintain open canopies without stressing the plant. Likewise, determine whether additional branches need removing if things become overly bushy.
- After Initial Harvests: Once the first flush of pods is finished, prune off any flowering stems that have already fruit-set. New growth will then focus upwards rather than outwards.
- Mid to Late Summer: As long as plants remain productive, occasional thinning of foliage and new shoots should continue every 4-6 weeks through the hottest months. This prevents excessive vegetation that can stress okra.
- Before First Fall Frost: Do a final light prune of any late-season growth about 1-2 months before your area’s typical frost date. This allows time for pod development without unnecessary top growth overwintering poorly.
These general guidelines allow you to establish strong central stalks through ongoing shapings timed with your okra’s growth stages. Next, we’ll cover which specific parts you should focus your pruning shears on.
What Parts of the Okra Plant to Prune
When aiming your pruning efforts, concentrate on the following key areas:
- Suckers: The upright shoots that emerge from the base or lower stems should be pinched or cut off. This redirects energy upwards rather than outwards.
- Leaf Axils: The zones where leaves join the stem tend to sprout side shoots. Pinch or cut off these small branches to open up plant architecture.
- Flowering Stems: Once pods have developed, prune off stalks that have already fruited to encourage subsequent side shoots.
- Damaged Leaves: Remove any discolored, wilted, or pest-eaten foliage to improve airflow and eliminate hazards.
- Lanky Growth: Overly long stems or branches should be trimmed back to the node/leaf junction to maintain attractive mounding shapes.
- Spent Flowers: Deadhead spent floral clusters to recycle energy back into the plant rather than seeds.
- Fruitless Branches: Chop offshoots not actively growing pods once pod production begins to focus energy.
By systematically snipping away sucker growth, opening up leaf axils, and removing unnecessary stems, you’ll establish a desirable open-center habit in your okra plants. Let’s explore the essential tools needed to effectively prune okra.
The Essential Tools for Pruning Okra
To get the job done efficiently and properly, you’ll want to have the right pruning equipment on hand. Here are a few essentials:
- Pruning Shears: A good pair of pruning shears with an anvil/lever action allows for controlled cuts. Look for rust-resistant stainless steel blades that hold an edge.
- Pruning Saw: For thicker stems and branches over 1/2”, a folding pruning saw is handy to have as an alternative to shears. It makes clean cuts safely.
- Pruning Gloves: Protective gloves with rubber gripping minimize hand fatigue and the risk of cuts from thorny growth or serrated leaf edges.
- Bucket or Bag: A container to collect prunings avoids messy piles and makes disposal simpler. I like reusable mesh garden bags.
- Loppers: For mature kra planting with thicker woody growth in the late season, long-handled loppers expand your pruning capabilities.
- Sharp Knife: A small folding knife cleans up suckers and side shoots where access is limited with larger tools.
Having the proper pruners, protective gloves, and something to collect trimmings in is crucial for speedy, effective okra pruning without injury. With your tools prepped, let’s review the step-by-step pruning process.
A Step-By-Step Guide to Pruning Okra
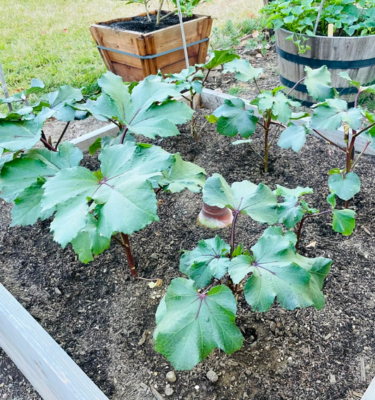
Here is a summary of the technique I’ve found most effective for shaping and maintaining productive okra plants:
- Inspect Plants Thoroughly
Examine entire plants, including lower foliage, stems, and developing side shoots or suckers before starting.
- Gather and Organize Tools
Make sure your pruners, gloves, and collection bag are easily accessible and in good working order.
- Wear Protective Gloves
Thorny okra stems and rough leaves necessitate sturdy gloves to prevent nicks and scrapes during pruning.
- Begin Pruning Suckers
Starting at the base, selectively remove upright suckers and excess side branching using pruners or a saw for thicker growth.
- Open Up Leaf Axils
Pinch or prune off any small side shoots emerging from where leaves join the main stem or larger branches.
- Trim Spent Flowering Stems
Once pods have set, prune off stalks that have already fruited back to the main branches or new growth.
- Tidy Damaged Leaves
Pick off any leaves showing signs of pests, disease, or wilting using pruners or a sharp knife as needed.
- Shape Branches and Stems
Trim lanky or overlong growth back to an outward-facing bud or node to maintain plant size and density.
- Collect and Dispose of Clippings
Use your collection bag to gather all prunings, then dispose of them in the yard waste for composting.
- Clean and Sharpen Tools
Sanitize pruners after use to prevent the spreading of disease or pests between plants. Periodically sharpen blades as required.
Following these basic steps ensures control over your okra’s size, shape, and ability to focus on sustained pod production season-long. Let’s add a few more tips for optimal plant health.
Additional Tips for Optimal Okra Growth
Here are some extra tidbits I’ve found helpful when pruning:
- Work in sections and prune regularly – Don’t overload yourself, and keep up with it every 2-4 weeks as needed.
- Prune in the morning for the quickest healing – Plants transpire better before the heat of the day to minimize stress from cutting.
- Disinfect tools between plants – This prevents transmission of any pest or disease present onto uninfected foliage.
- Fertilize after pruning – The stress stimulates new growth, so follow up with a balanced organic feed to support renewal.
- Water well if weather is dry – Maintain even soil moisture so pruned plants don’t dehydrate before healing over.
- Use pruning to train plants – Guide suckers into an open hedge row or individual staked plants for easy harvesting.
- Leave some cover for wildlife – Don’t strip all foliage, as it provides bugs for beneficial predators and pollinators.
- Compost or discard prunings – Burying them in soil risks disease issues, so either compost off-site or bag for disposal.
Keeping these additional points in mind helps your okra thrive dynamically even after routine pruning throughout its prime growing period. Let’s cover one more advanced technique…
How to Prune Okra Plants for a Second Harvest (Bonus!)
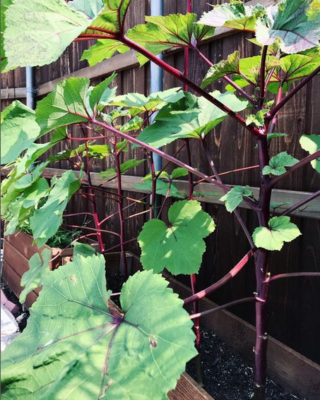
Experienced Southern gardeners know that okra’s main harvest usually spans 8-10 weeks before pods taper off. However, I’ve discovered with careful management, it’s possible to coax a successive flush of pods later in the season.
After the bulk of your initial harvest is over (August), prune okra plants back severely – remove at least 1/3 of their overall canopy mass. This short-term shock stimulates vigorous re-growth from cut ends.
Supplement your pruned plants with compost and a high-nitrogen, water-soluble plant food like fish emulsion. This nutritional boost supports their renewal process.
Within 2-3 weeks, newly branching foliage and flowers will emerge. Pod set then commences 4-6 weeks later as days shorten – right as chillier nights arrive in September or October.
With a modified planting plan leveraging fall’s milder temps, you can potentially harvest okra into very early winter before your first expected killing frost!
Give it a try – the second flush may yield slightly smaller but still tasty pods that extend your homegrown okra season through the end of the growing year with a little effort. Your plants will have more than paid for the care over the long haul.
In Conclusion
I hope my experience as an avid home gardener has helped convey the importance of properly pruning okra to maximize yields sustainably all season long. Regular shaping, selective thinning, and timely maintenance are key to healthy, productive plants crop after crop. Understanding when, where, and how to prune okra plants empowers you to take full control welcoming bounties of delicious okra harvests from spring well into fall. Give the techniques a try – you’ll be amazed at the difference it makes to both your gardening success and your snack plate. Feel free to reach out if you have any other questions!
FAQs on How to Prune Okra Plants
Do okra plants need to be pruned?
Yes, regularly pruning okra plants maintains a bushy shape and encourages continued production of quality pods throughout the growing season.
What is the effect of pruning on okra?
Pruning okra boosts air circulation, light penetration, and yield by removing excess foliage and directing the plant’s energy into pod development rather than vegetation.
What fertilizer is best for okra?
A balanced organic fertilizer high in nitrogen, phosphorus, and potassium helps okra thrive. Compost and fish emulsion are both excellent natural options.
Where to cut okra from plants?
For optimal regrowth, cut okra branches just above a node, outward-facing leaf, or developing side-shoot using clean, disinfected pruning shears.
What part of okra do you cut off?
The primary targets for pruning okra are sucker shoots from lower nodes, small side branches from leaf axils, and spent stems that have already produced pods.
How to make okra bushy?
Consistently removing excess growth while pruning encourages dense, branched side-shooting which creates the desired bushy habit for higher yields in okra plants.

Michael has been in the landscaping world for over 15 years. After obtaining his arborist certification, he dedicated himself to sharing his immense knowledge about plants, trees, and their proper care. Pruning is Michael’s passion. He’s spent decades mastering techniques for timing, methods, and tools. Michael takes great joy in ensuring others learn to maintain beautiful, healthy gardens, and landscapes. Whether through guides, tutorials, or advice, his goal is to equip homeowners and professionals with pruning expertise.
When it comes to choosing the right equipment, Michael is also incredibly knowledgeable. He has used countless pruning tools to discover the most durable, high-quality options. Michael understands what works best in the field. His in-depth comparisons will save you time and money by finding the perfect shears, loppers, trimmers, or saws.
With great respect for horticulture and sustainability, Michael is committed to educating communities. By sharing the insights gained over a lifetime around greenery, he empowers people to steward the planet’s verdant spaces responsibly. Nature is his true passion, and Michael aims to foster others’ love of the living world through his writings.
