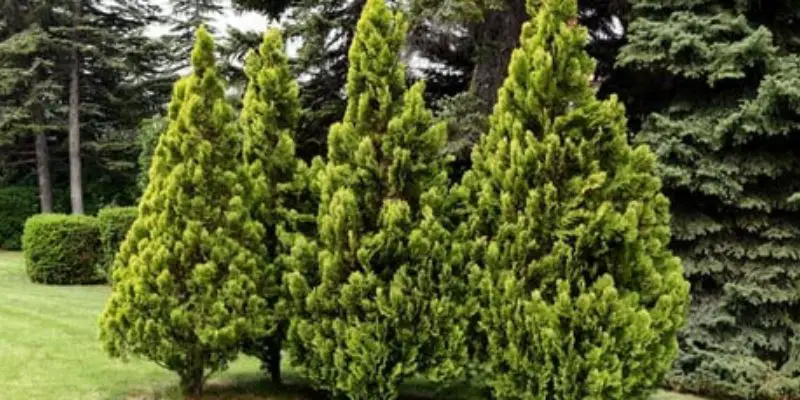
With their natural pyramidal shape and soft, feathery foliage, arborvitae shrubs make excellent evergreen specimens in landscaping beds and along property lines. However, without occasional corrective pruning, arborvitae lose their structural elegance and grow raggedy. Learning proper techniques for how to prune arborvitae restores order and beauty to unkempt plants.
This in-depth pruning guide covers everything homeowners need to know about maintaining tidy arborvitae. You’ll learn all about the right tools, timing, pruning methods, and aftercare for DIY revival of overgrown arborvitae shrubs. Soon you’ll restore definition to homely hedges!
The Arborvitae: An Evergreen Marvel Worth Celebrating
Let’s talk basics first. Sure, we all know it as the arborvitae, but this tree has a pretty cool scientific name too – Thuja. It’s part of the cypress family, which includes some other rockstar trees and shrubs. There are around five different arborvitae species, each with its own distinctive look and vibe. But the one we see starring in landscapes everywhere is the North American arborvitae, native to the northeastern U.S. and eastern Canada regions.
What really makes the arborvitae such a superstar in my eyes is its crazy versatility. Get this – depending on the specific cultivar, it can transform from a sky-scraping 60-foot tree into a cute little compact shrub, perfect for hedges and borders. That’s the kind of adaptability I aspire to! No matter how big or small it grows, an arborvitae always looks stunningly at home in the landscape.
The foliage is definitely a showstopper. Those flat sprays of tiny, scale-like evergreen leaves give arborvitae the most wonderful feathery texture. It’s like permanent holiday decor for your landscape! But those delicate leaves do more than look pretty. They’re coated in a waxy layer that helps the plant survive dry conditions like a champ.
Arborvitae’s naturally conical shape is also a major selling point. With barely any pruning needed, it maintains that classic pyramidal form so well. It’s all thanks to a funky little growth habit called “apical dominance” where the central upward stem kind of bosses the side branches around.
But let’s not overlook arborvitae’s role in the bird and wildlife community! Those dense evergreen branches provide excellent shelter and nesting spots. And when the male and female cones (they’re on separate plants) do their thing, the seeds become a tasty snack for squirrels, birds, and other critters.
There’s just something so timelessly elegant yet low-maintenance about arborvitae. Once you start geeking out over all its botanical marvels, you can’t help but appreciate this evergreen beauty even more. It’s a plant that deserves way more celebration in the gardening world, if you ask me!
Ecological Benefits of Proper Arborvitae Pruning
As plant lovers, we tend to obsess over the aesthetics of sculpting perfect conical forms and feathery foliage. But keeping arborvitae in peak condition through diligent pruning does so much more than create living garden art.
1. Biodiversity Boosters
It’s hard not to get starry-eyed thinking about how those dense, well-structured branches become a total luxury resort for songbirds, pollinators, and all their wild friends. Every snippet we prune away allows more light and air to filter through, creating an open invitation for critters to come nest, feed, and truly thrive. Giving nature a helping hand to boost local biodiversity? That’s gardening with a greater purpose.
2. Carbon Captors
Then you’ve got arborvitae’s straight-up heroics in the fight against climate change. These evergreen workhorses are exceptional at pulling carbon dioxide out of the atmosphere and locking it away for the long haul in their woody growth. The more we prune to optimize their vigor, the better they can perform this crucial act of carbon capture. It’s like giving Mother Earth the biggest, most appreciative bear hug every time we pick up those pruners.
3. Resilience Builders
And in an era of extreme weather changes, keeping arborvitae beautifully pruned and densely branched is one of the best ways to fortify our landscapes. Those well-tended specimens can shrug off high winds, heavy snows, and pesky pests & diseases way more effectively than their overgrown, neglected counterparts. We’re essentially training an elite force of climate-resilient plants! Pruning for the future has never looked so wise.
4. Water Conservationists
Water conservation is another big win. Arborvitae are total champs at conserving moisture once established, but strategic pruning seals the deal. Thinning out those inner branches improves airflow and light penetration, reducing vulnerability to fungal diseases that can soak up treatment resources. A few well-placed snips pull double duty – shaping aesthetic perfection while cutting down on water waste.
5. Aesthetic Ambassadors
At the end of the day though, there’s no denying that a properly pruned arborvitae is simply a vision to behold. We’re talking about living, breathing sculptures adorning the outdoor spaces we cherish. Sculpting those classic conical silhouettes and letting that lush evergreen foliage take center stage – it’s like putting the final brushstroke on a masterpiece in harmony with nature.
So let’s keep those pruners sharp and put some muscle into sustainable gardening practices, shall we? Every snip gets us closer to biodiversity havens, carbon-capturing champions, climate-resilient troopers, and water-wise stunners. Our arborvitae – and the planet we share – are counting on those passionate green thumbs!
When to Prune Arborvitae
As a preliminary step in learning how to properly prune arborvitae, consider timing carefully. Pruning at the wrong time of year causes undue stress which may negatively impact plant health.
The best time for pruning most arborvitae is mid to late winter or early spring before significant new growth emerges. Alternatively, prune immediately following the first hard frost in regions with mild winters.
Pruning when plants are fully dormant results in less sap bleeding from cut stems. It also reduces the chance of insects or diseases attacking freshly cut areas.
Tools & Supplies for Pruning Arborvitae
In addition to timing, having the proper pruning tools is equally important for how to prune arborvitae correctly. Investing in quality tools ensures clean cuts, minimizing damage to healthy plant tissues.
Here are the most essential tools for DIY arborvitae pruning:
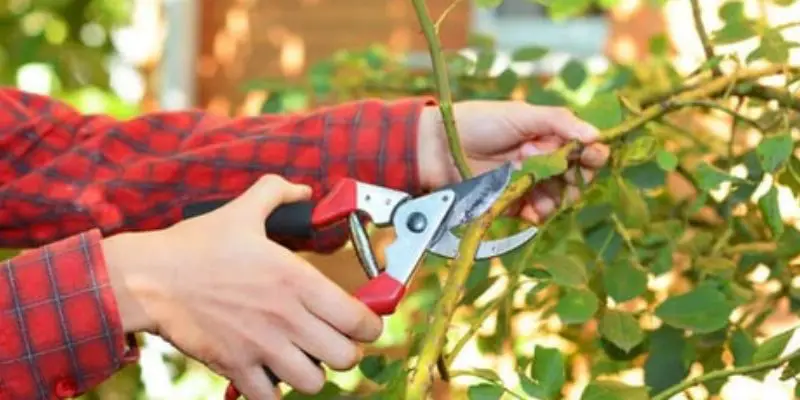
- Bypass hand pruners – Pruners provide a clean snip for stems up to 1⁄2 inch in diameter. Look for sturdy pruners with replaceable blade cartridges.
- Loppers – Long handles give better leverage and cutting capacity for stems up to 11⁄2 inches thick.
- Pole pruners – Pole pruners attach a saw or shear head allowing safe pruning beyond arm’s reach up to 11-16 feet high.
- Hedging shears – Hedging shears quickly shear through denser foliage. Some models feature extended handles or gear mechanisms for easier cutting.
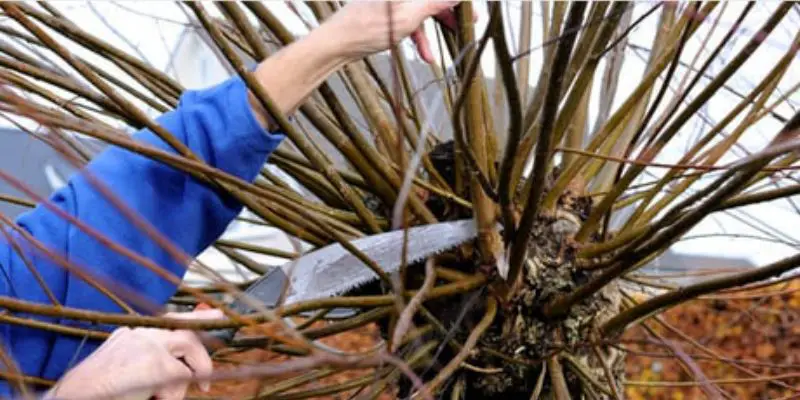
- Chainsaw – For renovating extremely overgrown arborvitae, a chainsaw safely removes heavy mature stems.
Always sanitize pruning tools before each cut with diluted bleach to avoid transmitting diseases between plants on contaminated blades. Now let’s explore correct pruning cuts and techniques for properly maintaining arborvitae.
How to Prune Arborvitae – Step By Step Guide
Sometimes learning exactly where and how to cut branches is the hardest part of knowing how to properly prune arborvitae. Take care not to inadvertently shear arborvitae into odd shapes or create holes in the natural pyramidal form.
Here are smart guidelines to follow when cutting back neglected arborvitae:
- Identify the strongest central leader – Choose one main vertical stem to retain as the central leader. Remove competing shoots to reinforce the primary leader over time.
- Prune judiciously – Remove no more than 1⁄3 of the total foliage during one pruning session to avoid undue stress on the plant.
- Use thinning cuts to improve air circulation and light penetration inside dense growth.
- Renewal pruning removes the oldest branches back to just above a side shoot to encourage new growth at the top.
- Shape overgrown arborvitae with heading cuts on long straying branches to tighten form.
- Make cuts just above healthy buds angled away from the center facing outwards to direct future growth.
By taking care of heading, thinning, and renewal pruning cuts, overgrown arborvitae transform back into neat pyramid-shaped specimens.
How to Prune Arborvitae Safely: Essential Arborvitae Pruning Tips
Gear Up for Safety
As passionate gardeners, we all dream of sculpting perfect arborvitae specimens. But before we get too pruner-happy, let’s talk safety. These stately evergreens may look elegant, but those dense branches and woody stems demand respect – and the proper precautions.
Trust me, I’ve taken my fair share of scratches and strains from improper techniques over the years. From scraped knuckles to aching backs, the hazards are no joke. But have no fear, my fellow green thumbs! With some preparation and mindfulness, you can keep your arborvitae in tip-top shape while keeping yourself safe and sound.
Tool Care 101
First thing first: invest in a quality pruning toolkit and take meticulous care of those blades. Nothing’s more dangerous than dull, rusty bypass pruners catching on stems. Keep those snippers, loppers, and saws razor-sharp through regular cleaning, oiling, and sharpening. Well-maintained tools are safe tools – and safe tools mean happy, uninjured gardeners.
Know Your Cutting Chops
Speaking of tools, make sure you’re using the right one for those thick, mature arborvitae branches. You’ll need a solid pair of bypass pruners or lopping shears to slice through cleanly. Anything too wimpy and you’re just begging for injury from overtaxed equipment or snapping branches. Know your tools’ limits, and don’t hesitate to break out the pruning saw for thicker growth.
Suit Up!
Protective gear may seem overkill for casual pruning, but trust me – it’s worth slipping into your arborvitae armor! At the very least, grab some sturdy leather gardening gloves to shield your hands from scratches and pinches. Those soft evergreen needles can do a number on exposed skin. For larger jobs, throw on some safety glasses to avoid nasty pokes to the peepers. Gardening should be zen, not an ER trip!
Study the Subject
Once you’re suited up with protective gear and proper tools, take a mindful moment to plan your approach. Don’t just start hacking away willy-nilly – that’s a recipe for injury and disfigured arborvitae! Study the natural growth patterns and make purposeful, form-following cuts. Let “prune with intention” be your mantra.
Reach Safely
For taller arborvitae specimens, invest in a sturdy orchard ladder to safely access those upper branches. Never overextend on unstable surfaces or stretch beyond your comfort zone. If you can’t quite reach some areas, it’s better to leave them for another day than risk a nasty fall.
Mind Your Posture
Don’t forget about ergonomics! Pruning can be deceivingly taxing work. Take frequent breaks to avoid back strain, muscle fatigue, and joint pain from all that repetitive motion. Bend at the knees, alternate stances, and stretch periodically to keep yourself feeling limber and injury-free.
Stay Fueled
Proper hydration and nourishment are key too. You’d be surprised how much pruning works up a sweat! Keep water and salty snacks nearby to replenish those electrolytes. A sluggish body leads to sluggish – and unsafe – pruning.
Know Your Limits
Most importantly, know when to call in professional reinforcements. Larger pruning jobs or major arborvitae renovations are best left to certified arborists with the right equipment and training. There’s no shame in admitting the limitations of your home gardening skills! Trust the experts when the situation warrants it for your safety and your evergreens’ well-being.
At the end of the day, pruning arborvitae can be incredibly rewarding and therapeutic when done knowledgeably and safely. By being proactive with your gear, ergonomics, and best practices, you can sculpt with confidence while keeping harm at bay.
Rejuvenating Overgrown Arborvitae

Occasionally, arborvitae grow enormously out of bounds requiring extensive renovation. Drastic corrective pruning removes up to two-thirds of total growth to completely rejuvenate neglected plants.
Follow this straightforward process for total arborvitae overhaul:
- Remove innermost branches first – Eliminate tangled interior branches with poor air circulation and light penetration.
- Thin remaining branches – Selectively thin remaining branches to open the plant for better maintenance moving forward.
- Shape – Trim wayward shoots to tighten overall form. Remove extra height to restore the original proportional dimensions.
- Renew – Cut back the oldest outside branches stimulating abundant new growth.
This systematic four-step approach helps renovate hopelessly overgrown arborvitae in a single intensive pruning session. Take care not to remove more than two-thirds of the living branches or risk permanent damage.
Arborvitae Aftercare Tips
The final aspect of learning how to properly prune arborvitae involves appropriate aftercare once the cutting is complete. Proper follow-up keeps freshly pruned arborvitae healthy while new branching develops.
Here are vital aftercare tips:
- Water thoroughly after pruning – Prevent added stress by watering deeply after cutting. Continue regular irrigation while new growth matures.
- Apply horticultural wax sealer – Seal cuts over 1” across to protect from insects and diseases while healing.
- Clean up debris promptly – Remove cut debris around the base immediately to reduce disease transfer to tender new shoots.
- Monitor for pests – Watch for signs of insects or diseases attracted to fresh wounds needing prompt control.
- Hold off additional pruning for at least one year – Allow adequate recovery time before successive cutting.
With attentive aftercare, rejuvenated arborvitae flourish with vibrant new branching. Proper follow-up transforms the oldest, most unkempt specimens into showstoppers once again!
Case Studies on Pruning an Arborvitae
Conclusion
Learning correct techniques makes maintaining attractive arborvitae shrubs much simpler. Follow timing recommendations to avoid interfering with flowering cycles or regrowth potential. Always sterilize tools before each cut to prevent transmitting diseases through unclean blades.
With the right tools in hand, transforming overgrown arborvitae back into shapely pyramidal specimens seems far less intimidating. Taking time to strategically remove older inner wood and dense branching brings renewed life even to aging, neglected arborvitae in the landscape. Soon you’ll tackle reviving unsightly overgrowth with confidence using these key tips on how to prune arborvitae .
Restore youthful vigor and shapely silhouette to uncared-for arborvitae with corrective dormant season pruning.
Also read:
Best Electric Bush Trimmers – Top 5 Reviews and Buying Guide
Best Electric Hedge Trimmer – Top 5 Picks and Buying Guide

Michael Glenn is a certified arborist and horticultural expert with over 15 years of experience in the landscape industry. His passion for plants and trees has led him to become a sought-after authority on pruning and trimming techniques. Glenn’s in-depth knowledge of proper pruning methods, timing, and tools has helped countless homeowners and professionals maintain healthy, aesthetically pleasing gardens and landscapes.
In addition to sharing his pruning expertise through practical tips, step-by-step guides, and expert advice, Glenn is also a respected author of pruning tool buying guides. His comprehensive reviews and comparisons ensure readers can make informed decisions when investing in quality loppers, pruning shears, saws, and other essential equipment. With a deep understanding of plant biology and sustainable practices, Glenn’s writing empowers audiences with the knowledge needed to properly care for green spaces.