Dull hedge trimmer blades can make quick work of your landscaping into a frustrating, snagging mess. But before you buy expensive replacement blades, consider sharpening your existing ones instead. Sharpening electric hedge trimmer blades restores their precision cutting ability and saves you money. This comprehensive guide covers everything you need to know to breathe new life into your old hedge trimmer with proper sharpening electric hedge trimmer blades.
Why Sharpen Electric Hedge Trimmer Blades?
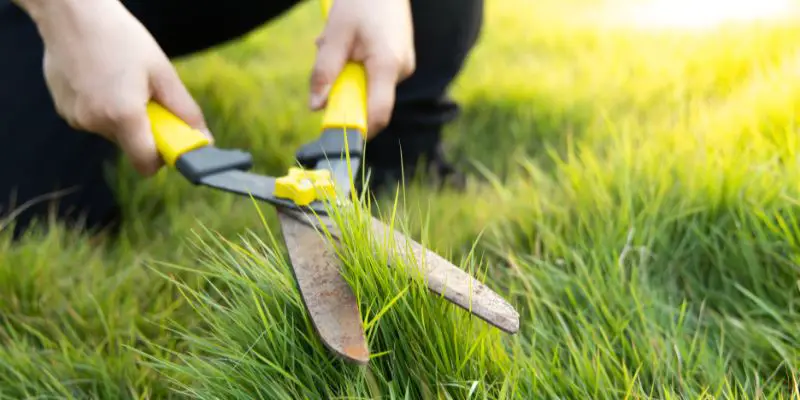
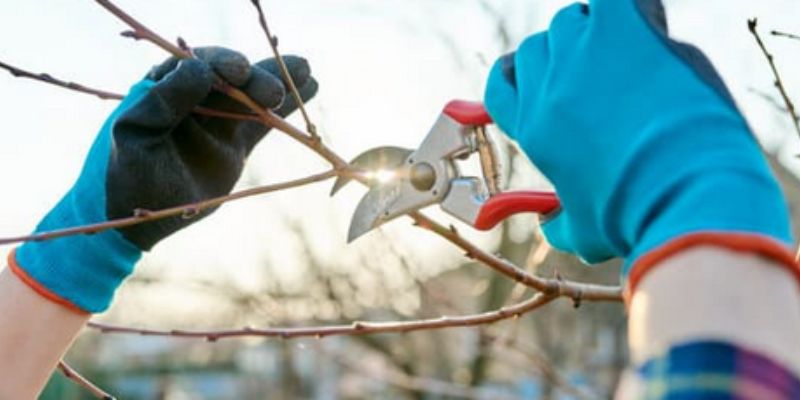
Hedge trimmers are indispensable tools for sculpting hedges, shrubs, bushes and other ornamentals into neat, uniform shapes. Powered by electricity or gas, their reciprocating dual blades make short work of branches up to 3/4″ thick. But over time, those rapidly moving blades gradually dull from all that cutting.
Dull hedge trimmer blades rip and tear instead of making clean, even cuts. Jagged, damaged branch ends turn brown and invite disease. Snagging dull blades also strain the trimmer motor and gears. Replacing your machine’s blade cartridge can cost $40-60 or more.
The good news is those old dull blades can be sharpened and regain their original smooth cutting ability. With proper sharpening techniques and tools, your hedge trimmer’s blades can cut like new again. This comprehensive guide will walk through everything involved in sharpening electric hedge trimmer blades. Follow these steps to restore peak performance to your landscape trimmer on the cheap.
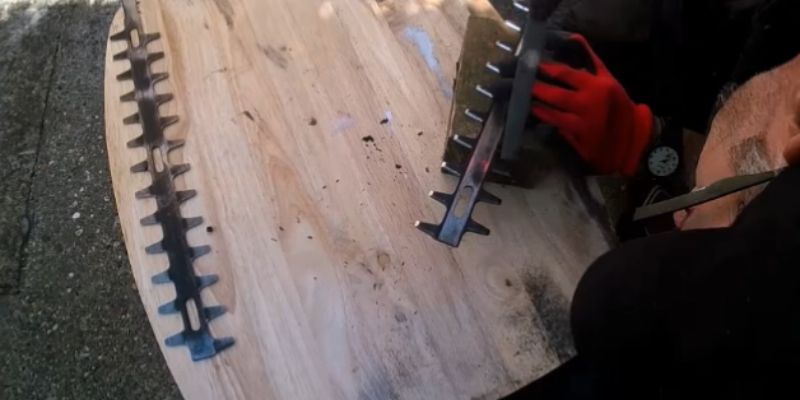
Disassembling the Blade Cartridge Safely
The first step in sharpening hedge trimmer blades is removing the blade cartridge from the trimmer head. This requires partially taking apart the cartridge assembly to access the blades themselves. Refer to the instruction manual for your specific trimmer model for directions on disassembly. But in general, here is the recommended process:
Step 1:
First, ensure the hedge trimmer is completely disconnected from any power source before disassembling. For corded electric models, unplug the power cord from the outlet. For cordless trimmers, remove the battery pack. This eliminates any risk of accidental electric shock or starting while working on the blades.
Step 2:
Next, locate the screws, clips, latches or other fasteners that hold the blade cartridge retained within the trimmer head. There may be several around the cartridge perimeter. Using the correct size screwdriver, wrench or other tool, remove the fasteners and detach the cartridge from the hedge trimmer.
Step 3:
With the cartridge removed, you’ll see it consists of two matching halves that sandwich and mount the blades. Carefully separate the two cartridge halves to expose the blade assembly between them. The blades may be fixed to one half and removable, or sandwiched directly between. If the blade position is obviously uneven or askew between halves, make a marking for reassembly later.
Step 4:
Before sharpening, it’s important to thoroughly clean the old grease, dirt, sap, grass clippings and other debris from the blades, cartridge halves, spacers and hardware. Soaking or scrubbing with isopropyl alcohol works well to dissolve built-up gunk. Getting down to bare metal ensures proper sharpening and reassembly. Inspect the blades closely for any signs of damage like nicks, dents, bent tips or missing teeth. Severely worn or damaged blades will need professional repair or replacement instead of sharpening.
Proper disassembly gives safe access to the hedge trimmer blades for sharpening. Make sure to work in a clean, well-lit area and take your time.
Prepping and Masking the Blades
With the blades removed from the cartridge, the next step is preparing them for sharpening by masking and examining the cutting edges. Start by using painter’s tape to cover the back side and body of each blade. This protects the finished blade surfaces from accidental damage during sharpening. Also cover or plug any lubrication holes or channels in the blades.
Carefully examine the angle and shape of the existing blade bevels using an angle finder tool. Make note of the angle measurements, as re-grinding must match the original bevels for proper cutting performance. If possible, compare the measurements to blade bevel specs in your instruction manual.
Finally, use solvent on a rag to thoroughly clean the cutting edges and bevel faces on both blades, exposing the bare metal underneath. Any accumulated debris can interfere with sharpening. The prepared blades are now ready to be ground to a new razor’s edge. Proper masking and understanding of the existing blade geometry is crucial for getting a perfect edge.
Choosing the Proper Sharpening Tools
Re-grinding and sharpening hedge trimmer blades requires using the appropriate sharpening tools for each step of the process. Here are the most common types of tools needed:
- Bench Grinder – A basic grinder with a coarse grinding wheel is used for the initial heavy material removal stage of sharpening. The fast-cutting coarse stone quickly establishes the new bevel angle on the hedge trimmer blades.
- Fine Whetstone or Diamond Hone – After coarse grinding removes the dull edge, switch to a fine India stone or diamond lap stone to further refine and polish the fresh cutting bevel.
- Small Rotary Tool – A Dremel or similar high-speed rotary tool allows sharpening hard to reach spots like the blade teeth, gullets and other detailed areas. Small grinding bits reshape the delicate toothed edges.
- Honing Guide or Sharpening Jig – This device holds the hedge trimmer blade at an exact preset angle against the grinding wheel for easy and precise sharpening. Maintaining the proper bevel angle is crucial.
- Flat Mill File – For quick touch-up sharpening of small dings and nicks between major grindings, a smooth flat mill file works well for hand sharpening flexibility.
The right sharpening tools make the difference between crude, uneven grinding and precise, polished edges. Investing in quality sharpening equipment saves frustration and allows reuse of blades for years before replacement is needed.
Re-establishing the Cutting Bevel Angle
With the right tools on hand, now the real sharpening work begins on the blades. Start by using a bench grinder to reshape the beveled cutting edges along both hedge trimmer blades. A coarse grinding wheel aggressively removes the dull, rounded-over material to re-form the cutting bevel. Here is the step-by-step process:
Step 1:
First, secure the hedge trimmer blade in a sharpening jig or honing guide clamp. Adjust the guide to match the original bevel angle of the blade, either by measuring with an angle finder or consulting factory specs. This is a crucial step – maintaining the correct bevel angle results in a sharper, better-cutting edge.
Step 2:
Next, switch on the bench grinder and allow it to reach full speed. Lightly lubricate the grinding wheel if needed. Carefully rest the blade edge against the spinning wheel, applying very light pressure at first. Gradually increase pressure while moving the blade back and forth until a fresh bevel face is established. Grind just enough to remove the rounded dull edge – 1/32″ or less should suffice.
Step 3:
Repeat the grinding on the opposite bevel face of the blade to create a fresh cutting edge along both halves of the blade lengths. Check blade angles often with an angle finder tool during grinding. Uneven angles will cause poor cutting performance. Quench blades in water to prevent overheating and loss of temper.
Step 4:
After coarse grinding both bevels, inspect the blades for remaining dull spots. Do additional targeted grinding along any uneven areas to establish a completely fresh cutting edge profile. Thorough coarse grinding provides the foundation for later polishing and honing steps.
Honing and Polishing the Blades
With the coarse grinding complete, the refreshed bevels on the hedge trimmer blades now need final honing and polishing. This is accomplished using finer sharpening tools like whetstones, diamond hones and strops. The goal is to refine the bevel faces and cutting edge to a mirror-like finish for maximum sharpness and smooth cutting.
Start by lapping the newly ground bevels using a fine India oil stone, fine Arkansas stone or diamond lap stone. Use light honing motions along the bevels to refine and smooth the surfaces left by coarse grinding. Move the blade across the stone using consistent, even strokes while maintaining the exact bevel angle.
Finish sharpening using a leather honing strop charged with fine polishing compound. Draw the blades over the turning strop to refine the edge down to a razor-like sharpness. Rinse and clean blades between steps to inspect progress under magnification. The desired result is an ultra-smooth edge and bevel with no detectable burrs or imperfections.
Proper honing and polishing eliminates the microscopic roughness left by grinding that causes tearing and snagging. When done expertly, hand stropping can actually create a sharper edge than grinding alone. Those finely polished, gleaming bevels will have your hedge trimmer cutting like new.
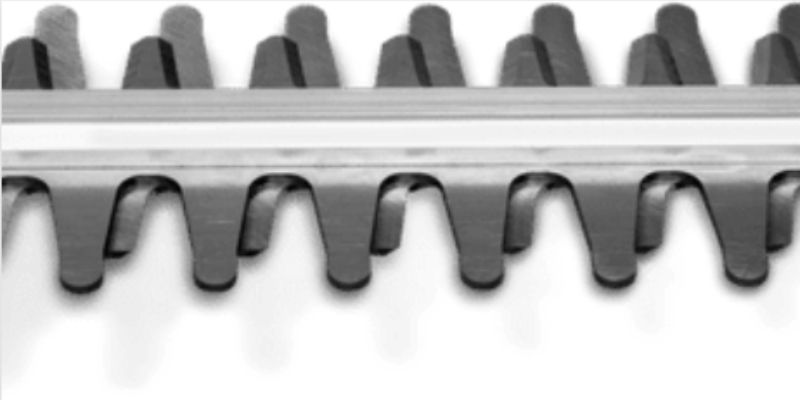
Sharpening the Blade Teeth
The teeth along the cutting edges of hedge trimmer blades also need proper sharpening for optimal performance. Here are steps to effectively sharpen the blade teeth:
- Examine the existing tooth geometry and note the shape, spacing, angles and size. Sharpening must maintain this original design.
- Use a small mounted grinding stone bit in a rotary tool to reshape and repoint the cutting tip of each tooth. Work slowly and carefully.
- Apply light pressure as you sharpen each tooth to avoid over-grinding. Just a few seconds per tooth is likely sufficient.
- Frequently stop to compare your progress against the original tooth shape and spacing. Adjust your motions to replicate the geometry.
- For extra precision, consider using a sharpening jig to hold an exact angle around the rotary bit as you sharpen.
- Make sure to sharpen all teeth evenly across both blades. Inconsistent teeth will lead to a rough cut.
Properly sharpened and uniform teeth help guide branches into the blades for a clean cut while minimizing blade juddering. Take your time on this step to get the teeth precisely matched to the original shape, length and spacing. Those finely detailed cutting edges will slice through hedges easier than ever.
Reassembling the Cartridge Halves
After all sharpening work is complete, the blade cartridge must be carefully reassembled. Here are some tips for proper reassembly:
- Remove any tape, coverings or stops used for masking during the sharpening process. Rinse and fully dry blades.
- Insert blades back into their original positions in the cartridge halves per your alignment marks. Proper blade spacing and orientation is critical.
- Replace any spacers, washers, bushings or hardware in their original locations if disassembled.
- Apply fresh lithium grease to lubrication ports or channels. Avoid getting grease on blade edges or bevels.
- Tighten all screws and fasteners to the proper torque specifications stated in your instruction manual. Do not overtighten.
- Ensure cartridge halves mate flush with blades fully captured in between. Binding indicates improper alignment.
- Inspect for any missing parts or fasteners before remounting the cartridge in the trimmer.
Taking the time to correctly reassemble the sharpened blades in the cartridge will pay off in smooth, vibration-free cutting. Don’t skip any steps.
Testing and Adjusting Your Work
Before putting the sharpened hedge trimmer blades back into regular use, they should be thoroughly tested and adjusted as needed. Follow these tips:
- Carefully examine the full length of the blade edges under magnification to check for any remaining burrs, uneven spots or imperfections left after sharpening. Use a fine stone by hand to polish out any flaws detected.
- Power up the hedge trimmer and listen closely for any odd vibrations, grinding or rattling noises that may indicate problems with blade cartridge alignment or balance. Imbalanced blades must be rechecked and realigned in the cartridge before use to prevent damage.
- Make some test cuts on expendable scrap material, watching for smoothness and ease of cutting. Any snagging or tearing indicates a problem with blade sharpness.
- Examine sample cuts and cut surfaces to evaluate sharpness. Make micro-adjustments to the bevel angle and tooth geometry if needed.
- Confirm the cartridge is securely locked and retained in the trimmer head before regular use. Check for any loose parts.
Taking time to dial in and adjust your sharpening work ensures your hedge trimmer blades will function like new for more demanding trimming tasks ahead. Be prepared to do minor follow-up sharpening periodically to maintain performance. Properly cared for blades can last many years.
Final Thoughts on Sharpening Electric Hedge Trimmer Blades
Sharpening your own hedge trimmer blades allows getting significantly more use from them compared to constantly buying replacement blades. With some basic mechanical skills and the right techniques, you can breathe fresh life back into dull hedge trimmer blades rather than discarding them. Just follow this comprehensive guide:
- Carefully disassemble the blade cartridge to access the blades
- Prepare and mask the blades for sharpening
- Use the proper bench grinding and honing tools
- Re-establish precise bevel angles with coarse grinding
- Refine and polish edges to a mirror finish
- Sharpen and shape all blade teeth
- Reassemble cartridge precisely per original
- Test and confirm excellent cutting performance
Saving money and reducing waste by sharpening your own electric hedge trimmer blades takes some time and patience. But the reward is a blade set that cuts smoothly and accurately for years to come. So before throwing out that dull trimmer, consider sharpening it instead. With this guide’s steps, you can take on most models and have it slicing hedges again in no time.

Michael Glenn is a certified arborist and horticultural expert with over 15 years of experience in the landscape industry. His passion for plants and trees has led him to become a sought-after authority on pruning and trimming techniques. Glenn’s in-depth knowledge of proper pruning methods, timing, and tools has helped countless homeowners and professionals maintain healthy, aesthetically pleasing gardens and landscapes.
In addition to sharing his pruning expertise through practical tips, step-by-step guides, and expert advice, Glenn is also a respected author of pruning tool buying guides. His comprehensive reviews and comparisons ensure readers can make informed decisions when investing in quality loppers, pruning shears, saws, and other essential equipment. With a deep understanding of plant biology and sustainable practices, Glenn’s writing empowers audiences with the knowledge needed to properly care for green spaces.