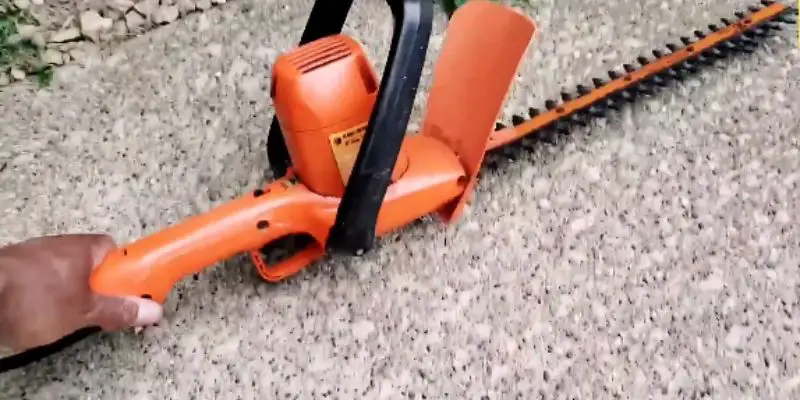
As an avid gardener for over 10 years, I’ve used my fair share of Black and Decker hedge trimmers to keep my hedges neat and tidy. Over time, I’ve learned some great tips and tricks on how to properly use these popular trimmers to make hedge maintenance easy and enjoyable.
In this article, I’ll share my first-hand experience on how to use Black and Decker hedge trimmers like a pro. You’ll learn insider techniques on everything from assembly, operation, troubleshooting to maintenance. My goal is to help you become an expert using your Black and Decker trimmer.
Let’s start with a quick overview of the brand and the benefits of using their hedge trimmers:
Why Choose Black and Decker?
With over 100 years of power tool experience, Black and Decker is a leader in electric lawn and garden tools. They offer a wide range of high-quality hedge trimmers for homeowner needs.
Reasons to consider Black and Decker hedge trimmers:
- Trusted brand name known for durability and performance
- Cordless and corded models available
- Powerful motors and sharp blades
- Lightweight and ergonomic designs
- Affordable pricing for most budgets
- 2-year warranty on most models
I’ve used many Black and Decker trimmers over the years without any major issues. They stand up well to regular home use.
Now let’s dive into how to use Black and Decker hedge trimmers like a professional:
Assembling Your New Trimmer
Before you can start snipping away, you’ll need to assemble your new Black and Decker hedge trimmer. Here are some tips:
- Carefully remove all parts from the box and packaging
- Lay out all components on a flat surface
- Consult the instruction manual for model-specific assembly steps
- Most models simply require attaching the safety guard and handles
- Ensure all plastic housing pieces and blade covers are fully snapped in place
- Do not force pieces together – align them gently
- Use included tools to tighten any bolts or screws
Assembly is quick and straightforward for most Black and Decker trimmers taking less than 10 minutes. Just take your time and double check alignments.
Charging the Battery (for Cordless Models)
If you purchased a Black and Decker cordless hedge trimmer, the next step is charging the battery before first use. Here’s how to charge properly:
- The battery pack may be separate or already attached
- Look for the charging port – newer models use USB-type connectors
- Plug the charger securely into the port on the battery pack
- Insert charger into wall outlet
- Charging light indicates when battery is fully charged
- Most batteries take 1-2 hours for full charge
- Do not charge for more than 24 hours
Follow the manual for your specific model’s charging instructions. Never force the charging connections. Wait for a full charge before using to ensure maximum runtime.
Reviewing the Safety Features
Before using any power tool, it’s critical to understand its safety features. Here are the key safety elements found on most Black and Decker hedge trimmers:
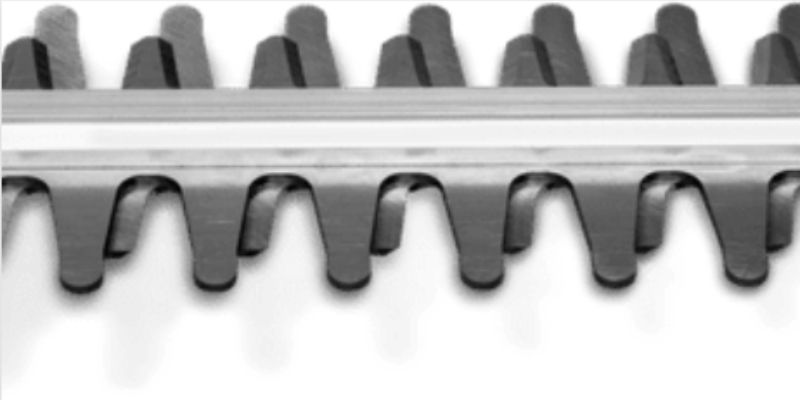
- Double Trigger Switch – Reduces risk of accidental starting. Must squeeze two sides to power on.
- Hand Guard – Shields hands from contacting blades accidentally.
- Scabbard – Protective cover to place over blades when not trimming.
- Cord Retainer – Prevents accidental cord unplugging during charging.
- Emergency Stop – Stops blades within seconds if trigger released.
Take the time to identify where these safety components are on your particular trimmer model. Never attempt to disable or remove safety features – this voids the warranty.
Adjusting the Auxiliary Handle
Most larger Black and Decker hedge trimmers have an adjustable auxiliary handle for two-handed operation. Here are some tips on positioning it:
- Loosening the handle clamp allows adjustment
- Set at natural comfortable angle for your grip
- Avoid awkward wrist bending positions
- Can adjust vertically for side trimming or horizontally for top trimming positions
- Useful for controlling trimmer head while cutting
- Adjust for overhand vs underhand grip styles
- Tighten handle securely before operation
Take a few test grips to find the optimum angle that minimizes hand and wrist strain for your particular trimming needs. This improves control and comfort.
Trimming Best Practices
Once assembled and charged up, you’re ready to start trimming. Here are some recommendations for best results:
- Study hedge first to plan your cutting strategy
- Hold trimmer firmly using both hands
- Keep cord or body away from blades during cutting
- Start at bottom and cut upwards
- Cut sides before top for better control
- Take off 1/3 of growth per pass for uniformity
- Make slow, steady passes through hedge
- Use extensions if needed for tall hedges
- Stop to clear any jams immediately
Take it slow on your first trim session to get a feel for controlling the power and direction of the blades. Let the tool do the work without forcing it.
Technique Tips to Remember
Follow these technique tips when using your Black and Decker hedge trimmer for best results:
- Angle blade slightly outward from hedge
- Use multiple passes for thicker branches
- Move slowly to ensure clean cuts
- Apply even pressure along entire blade length
- Adjust hand positions to avoid fatigue
- Periodically stop to check progress
- Clean blades frequently when trimming dense growth
- Plan breaks to avoid overheating motors
Proper technique prevents jams, uneven cuts, blade dulling, and motor burnout. Be patient and let the hedge trimmer do its job.
How to Use Black and Decker Hedge Trimmer – Helpful Trimming Guidance
Here are some additional trimming recommendations for success using Black and Decker hedge trimmers:
- Maintain sharp blade for easier cutting
- Cut young branches first before older wood
- Trim sides before top for better visibility
- Keep extension cord clear of blades
- Unplug when changing blade angles
- Spray blades with water to reduce dust
- Monitor battery charge level during use
- Apply blade lubricant to prevent rust
Follow these tips and your hedges will look neatly manicured in no time. Let’s move on to troubleshooting common issues.
Troubleshooting Problems
Here are solutions to common problems when using Black and Decker hedge trimmers:
Trimmer won’t start – Check battery charge or outlet power. Confirm safety trigger is fully engaged.
Uneven trimming – Sharpen blades which may be dull. Slow down pace and trim at consistent angles.
Excessive vibration – Blades may be unbalanced. Remove blades, clean and reinstall evenly.
Loud noise – Lubricate or replace worn gears or bearings. Check blade tightness.
Overheating motor – Allow motor breaks to cool. Don’t overload capacity by forcing cuts.
Jams frequently – Slow down trimming rate. Keep blades sharp and lubricated. Reduce maximum branch thickness.
Simple issues like dull blades, clogs or dead batteries account for most hedge trimmer problems. Follow the product manual troubleshooting guidance as well.
Maintenance Tips
Perform regular maintenance on your Black and Decker hedge trimmer to keep it operating smoothly:
- Inspect housing, guards and handles for damage
- Check blades for wear and evenly sharpen
- Lubricate blades and internal gears
- Clear debris from air vents using compressed air
- Wipe exterior with damp cloth after use
- Store indoors or protected location when not in use
- Avoid exposing to rain and moisture
- Fully recharge batteries before winter storage
Proper cleaning, lubrication and storage will extend the lifespan of your trimmer for many seasons of use.
Time for a New Trimmer?
Over years of frequent use, Black and Decker hedge trimmers will eventually wear out. Here are signs indicating you may need a replacement:
- Visible cracks in plastic housing
- Very dull blades that won’t sharpen
- Fraying power cord with exposed wiring
- Weak battery unable to hold charge
- Motors that spark, smoke or smell burnt
- Excessive vibration and noise during use
For your safety, stop using any trimmer showing these deterioration signs and buy a new replacement unit. The costs of repairs will likely outweigh the price of a new model.
Choosing the Right Model
With a wide range of corded, cordless and gasoline-powered models, choosing the right Black and Decker hedge trimmer depends on several factors:
- Hedge size – Length and thickness
- Frequent usage – Light, moderate, heavy
- Power source – Battery, electric, gas
- Blade length – Cutting reach
- Cutting thickness – Branch diameter
- Weight – Heavier models fatigue quicker
- Features – Swivel handles, blade covers
- Budget – From $50-$350
Match the trimmer’s specifications to your specific hedge maintenance needs. For smaller hedges, compact 20V cordless models are ideal. Bigger hedges require more power and longer blades. Gas trimmers are best for large properties. Visit a local store to test different models hands-on. A quality Black and Decker trimmer will provide years of reliable service keeping your hedges neat and tidy each season.
Also read:
Best Electric Black & Decker Hedge Trimmer – Top 3 Corded Picks
Top 5 Best Black and Decker Cordless Hedge Trimmer Reviews
FAQs on How to Use Black and Decker Hedge Trimmers
To wrap up this guide, here are answers to frequently asked questions about using Black and Decker hedge trimmers:
Q1: How often should I sharpen the blades?
Aim to sharpen the hedge trimmer blades before each major trimming session or as needed when cutting performance declines. Sharper blades cut easier and cleaner.
Q2: Can I use a pressure washer to clean my trimmer?
No, avoid using a high-pressure washer. The powerful water can damage the motor, blades and plastic housing. Gently hand wipe instead.
Q3: What blade lubricant is best?
Use a specific lubricant designed for hedge trimmers, not standard oils. LubriPlate works well. Apply lightly along the blade edge.
Q4: How do I know when the battery needs replacing?
Replace old batteries that no longer hold a charge. New batteries run 30-60 minutes vs 10 minutes when worn out.
Q5: What causes the blades to jam frequently?
Blade jams are often due to dull or uneven blades. Regularly sharpen and ensure both blades are equally sharp.
Q6: Can I leave my Black and Decker trimmer outside?
Do not leave hedge trimmers outdoors exposed to rain and moisture which can damage the motor and metals parts. Store in a shed or garage.
Following the tips in this comprehensive guide will help you become an expert using your Black and Decker hedge trimmer like a pro. Please share any additional maintenance advice in the comments below!

Michael Glenn is a certified arborist and horticultural expert with over 15 years of experience in the landscape industry. His passion for plants and trees has led him to become a sought-after authority on pruning and trimming techniques. Glenn’s in-depth knowledge of proper pruning methods, timing, and tools has helped countless homeowners and professionals maintain healthy, aesthetically pleasing gardens and landscapes.
In addition to sharing his pruning expertise through practical tips, step-by-step guides, and expert advice, Glenn is also a respected author of pruning tool buying guides. His comprehensive reviews and comparisons ensure readers can make informed decisions when investing in quality loppers, pruning shears, saws, and other essential equipment. With a deep understanding of plant biology and sustainable practices, Glenn’s writing empowers audiences with the knowledge needed to properly care for green spaces.